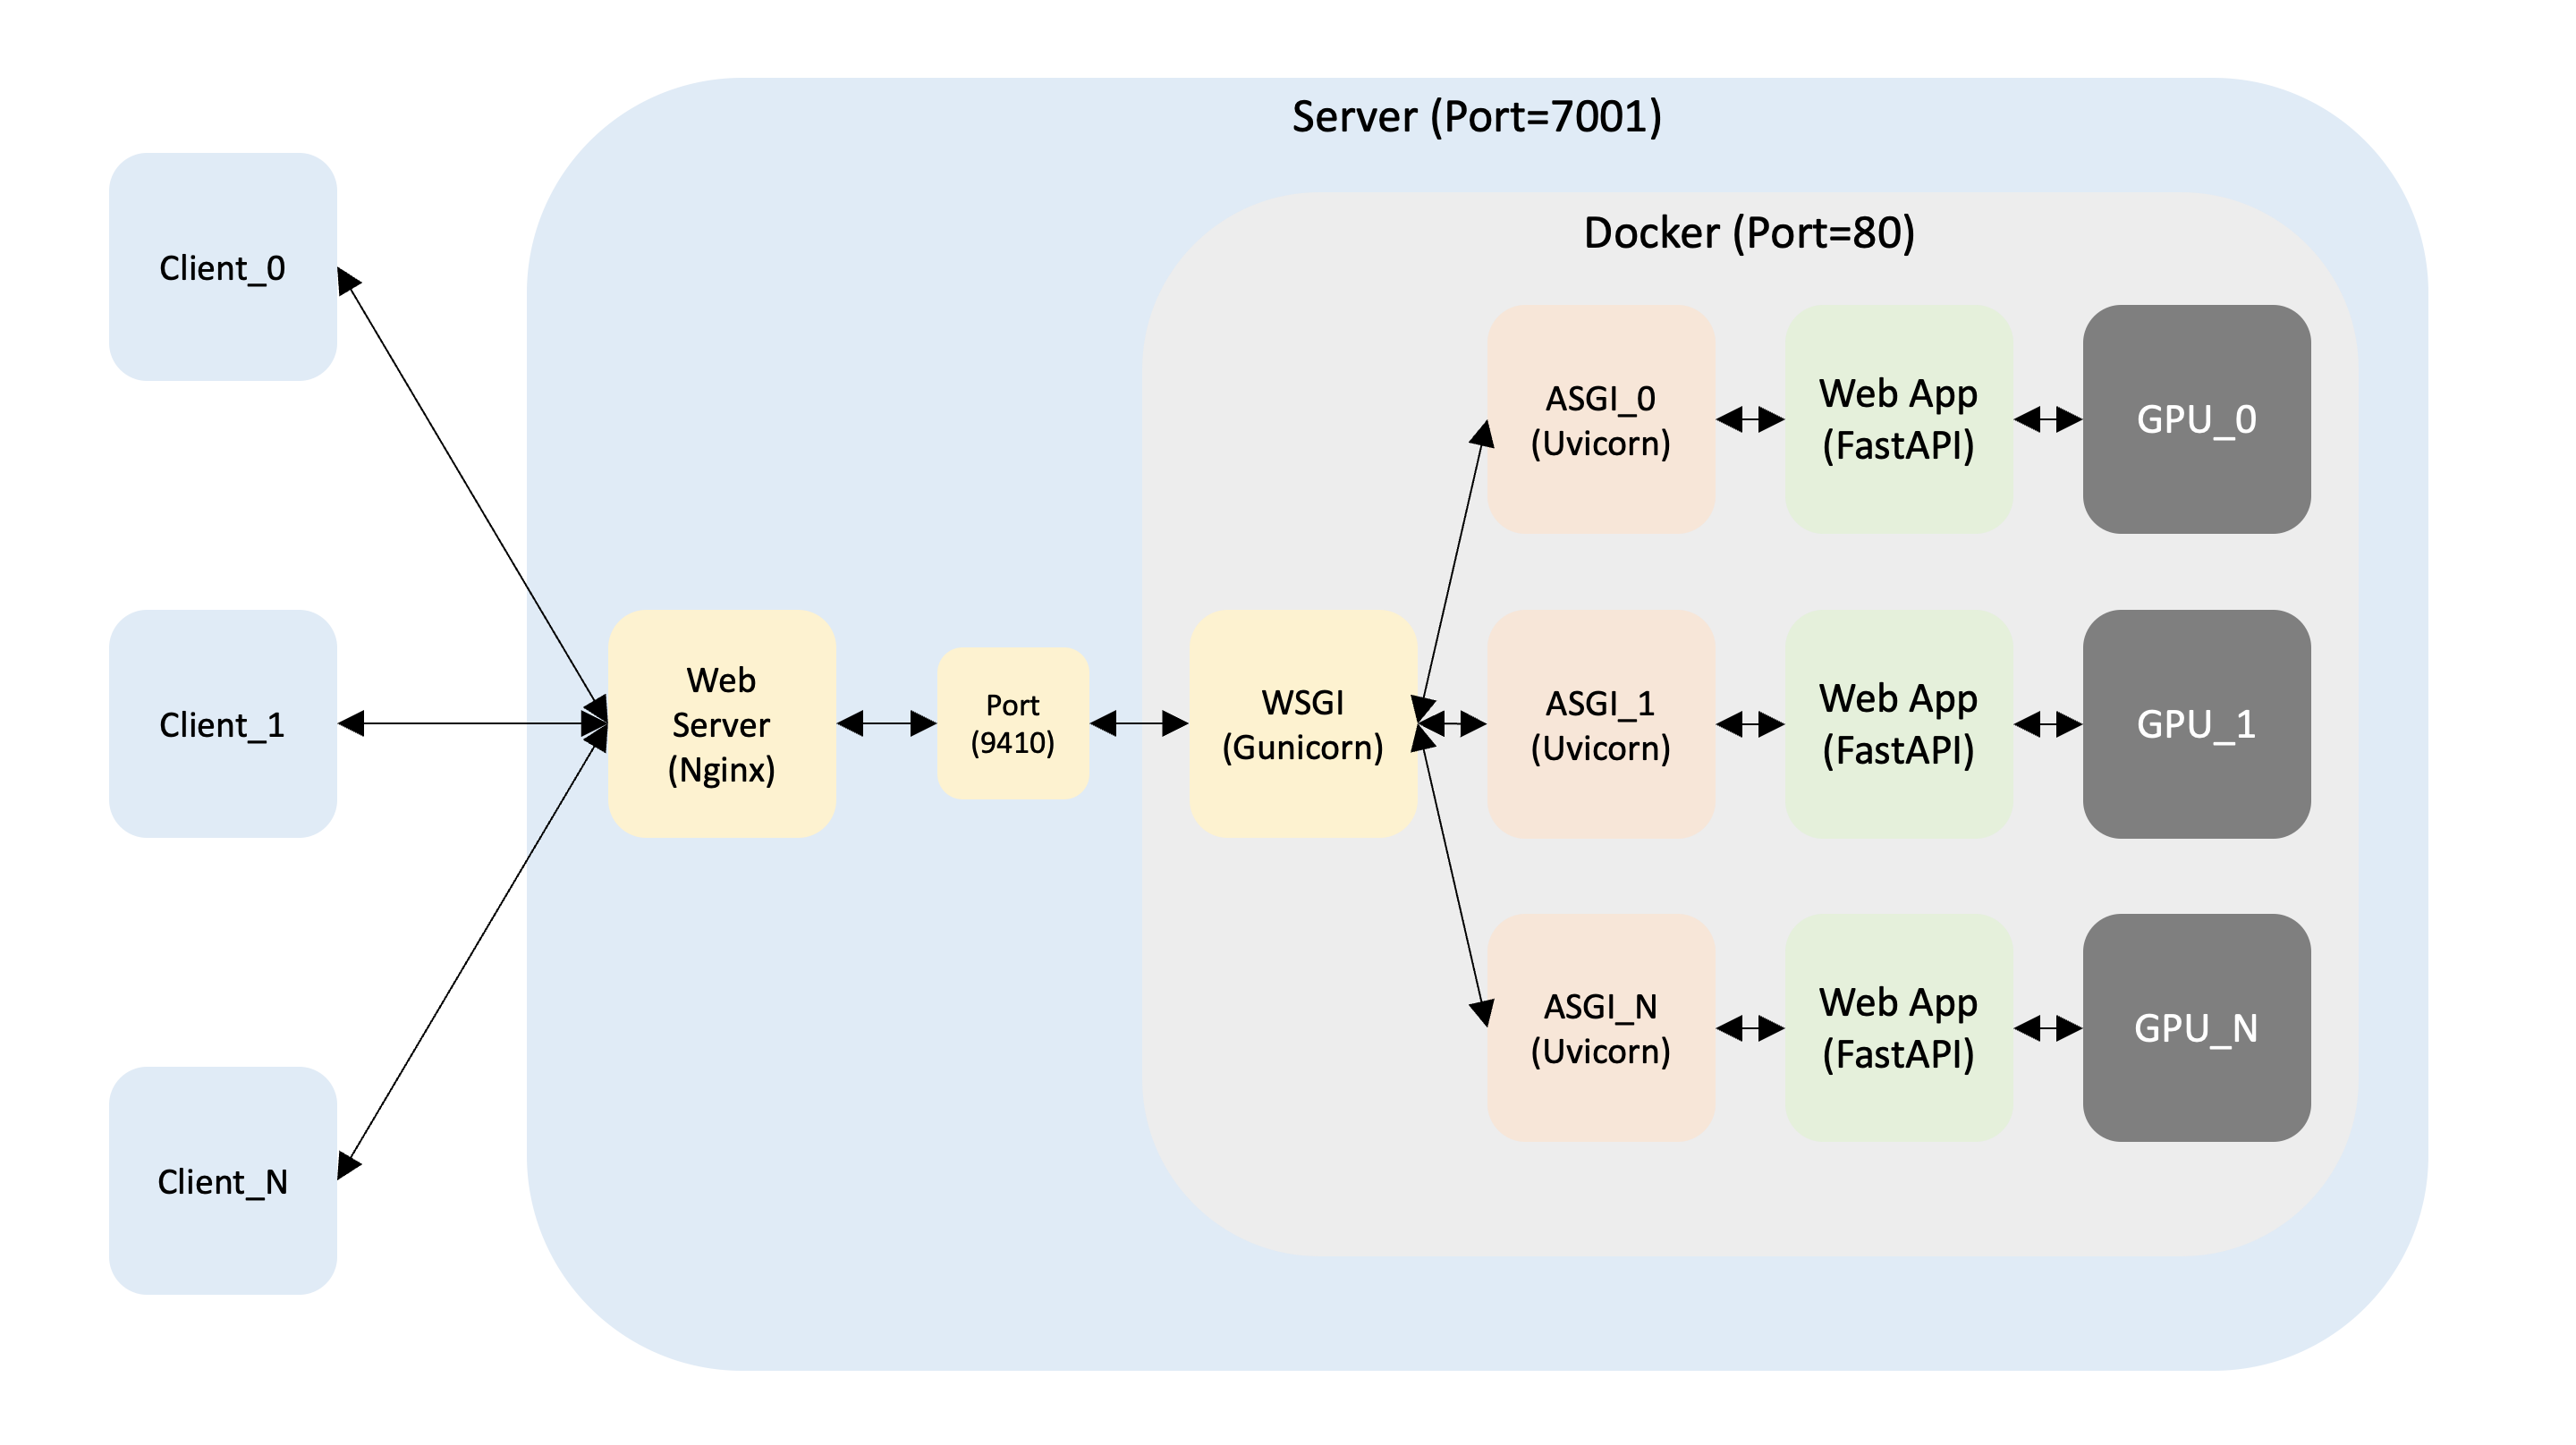
2. Nginx + Docker + Gunicorn + Uvicorn + FastAPI
1. Mission
Load Balancing 및 추후 서버 증설 → Nginx
Multiple Requests → Gunicorn + Uvicorn
비동기 웹 애플리케이션 → Uvicorn + FastAPI
GPU → nvidia/cuda
2. Docker
1) Docker 설치
apt-get update
apt-get install apt-transport-https ca-certificates curl gnupg lsb-release -y
-fsSL https://download.docker.com/linux/ubuntu/gpg | sudo gpg --dearmor -o /usr/share/keyrings/docker-archive-keyring.gpg
echo "deb [arch=amd64 signed-by=/usr/share/keyrings/docker-archive-keyring.gpg] https://download.docker.com/linux/ubuntu $( lsb_release -cs) stable" | sudo tee /etc/apt/sources.list.d/docker.list > /dev/null
apt-get update
apt-get install docker-ce docker-ce-cli containerd.io -y
docker status
3. nvidia/cuda
1) nvidia/cuda 이미지 설치
nvidia/cuda를 사용해야 하므로 server CUDA 버전에 맞는 nvidia/cuda:11.0-base Docker 이미지를 가져온다.
pull nvidia/cuda:11.0-base
2) nvidia/cuda 컨테이너 생성
Docker Hub에서 가져온 nvidia/cuda:11.0-base를 이용하여 test라는 컨테이너를 생성한다.
run -it --gpus all --name test nvidia/cuda:11.0-base /bin/bash
3) Docker 새창 띄우기 (옵션)
Docker에서는 각각 attach를 하더라도 화면에 보여지는 내용이 서로 동기화되므로 새창을 띄워서 작업하는 것이 좋다.
exec -it test /bin/bash
4) Ubuntu 버전 확인
5) nvidia-smi 확인
6) ubuntu 환경설정
(1) 기본 설치
update && apt-get upgrade -y
install sudo -y
install vim -y
install htop -y
install curl -y
install wget -y
install tmux -y
install systemd -y
(2) Vim encoding 변경
Vim의 encoding을 변경하지 않으면 한글이 깨지므로 변경하는 것이 좋다.
echo "set encoding=utf-8" >> /etc/vim/vimrc
echo "set fileencodings=utf-8,cp949" >> /etc/vim/vimrc
(3) root 비밀번호 생성 (옵션)
(4) user 생성 (옵션)
(5) sudo 권한 부여 (옵션)
(6) user 변경 및 홈디렉터리 이동 (옵션)
4. Conda
1) Conda 다운로드
curl 명령어와 해당 파일의 URL을 이용하여 현재 OS와 원하는 버전에 맞게 다운로드한다.이때 다운로드 디렉터리를 /tmp로 지정했는데, 다른 곳에 해도 상관 없다.
cd /tmp
-O https://repo.anaconda.com/archive/Anaconda3-2021.05-Linux-x86_64.sh
2) Conda 설치
bash 명령어를 이용하여 .sh 파일을 실행시킨다.
Anaconda3-2021.05-Linux-x86_64.sh
3) Conda 환경변수 초기화
Conda가 실행될 수 있도록 Conda 환경변수를 초기화한다.
source ~/.bashrc
$( base) conda info
4) ~/.bashrc 자동 실행
매번 환경변수를 지정해 주는 것보다 자동 실행되도록 하는 것이 좋다.
if [ -s ~/.bashrc ] ; then
source ~/.bashrc;
fi
5) Conda 업데이트
$( base) conda update conda -y
$( base) conda update anaconda -y
6) Conda 가상환경 생성 (옵션)
$( base) conda create -n 가상환경명 python = 파이썬버전 -y
5. Python 라이브러리
1) PyTorch(CUDA: 11.0) 설치
$( base) conda install pytorch == 1 .7.1 torchvision == 0 .8.2 torchaudio == 0 .7.2 cudatoolkit = 11 .0 -c pytorch -y
2) HuggingFace 설치
$( base) conda install -c huggingface transformers -y
3) FastAPI + Uvicorn + Gunicorn 설치
$( base) pip install fastapi uvicorn gunicorn
4) 기타 설치
$( base) pip install tqdm PyYAML pandas sentencepiece
6. Python 테스트
1) PyTorch + HuggingFace 테스트
(1) cpu_test.py 작성
from transformers import M2M100ForConditionalGeneration , M2M100Tokenizer
def m2m ( ko_text : str , model : object , tokenizer : object , device : str ):
model = model . to ( device )
encoded_text = tokenizer ( ko_text , return_tensors = "pt" ) . to ( device )
generated_tokens = model . generate (
** encoded_text , forced_bos_token_id = tokenizer . get_lang_id ( "en" )
)
translated = str (
tokenizer . batch_decode ( generated_tokens , skip_special_tokens = True )
) . strip ( "]['" )
return translated
def main ():
print ( f "Downloading..." )
model_name = "facebook/m2m100_418M"
model = M2M100ForConditionalGeneration . from_pretrained ( model_name )
tokenizer = M2M100Tokenizer . from_pretrained ( model_name )
tokenizer . src_lang = "ko"
ko_text = "안녕하세요"
device = "cpu"
translated = m2m ( ko_text , model , tokenizer , device )
print ( f "Result: { translated } " )
if __name__ == "__main__" :
main ()
(2) cpu_test.py 실행
$( base) python cpu_test.py
(3) gpu_test.py 작성
from transformers import M2M100ForConditionalGeneration , M2M100Tokenizer
def m2m ( ko_text : str , model : object , tokenizer : object , device : str ):
model = model . to ( device )
encoded_text = tokenizer ( ko_text , return_tensors = "pt" ) . to ( device )
generated_tokens = model . generate (
** encoded_text , forced_bos_token_id = tokenizer . get_lang_id ( "en" )
)
translated = str (
tokenizer . batch_decode ( generated_tokens , skip_special_tokens = True )
) . strip ( "]['" )
return translated
def main ():
print ( f "Downloading..." )
model_name = "facebook/m2m100_418M"
model = M2M100ForConditionalGeneration . from_pretrained ( model_name )
tokenizer = M2M100Tokenizer . from_pretrained ( model_name )
tokenizer . src_lang = "ko"
ko_text = "안녕하세요"
device = "cuda"
translated = m2m ( ko_text , model , tokenizer , device )
print ( f "Result: { translated } " )
if __name__ == "__main__" :
main ()
(4) gpu_test.py 실행
$( base) python gpu_test.py
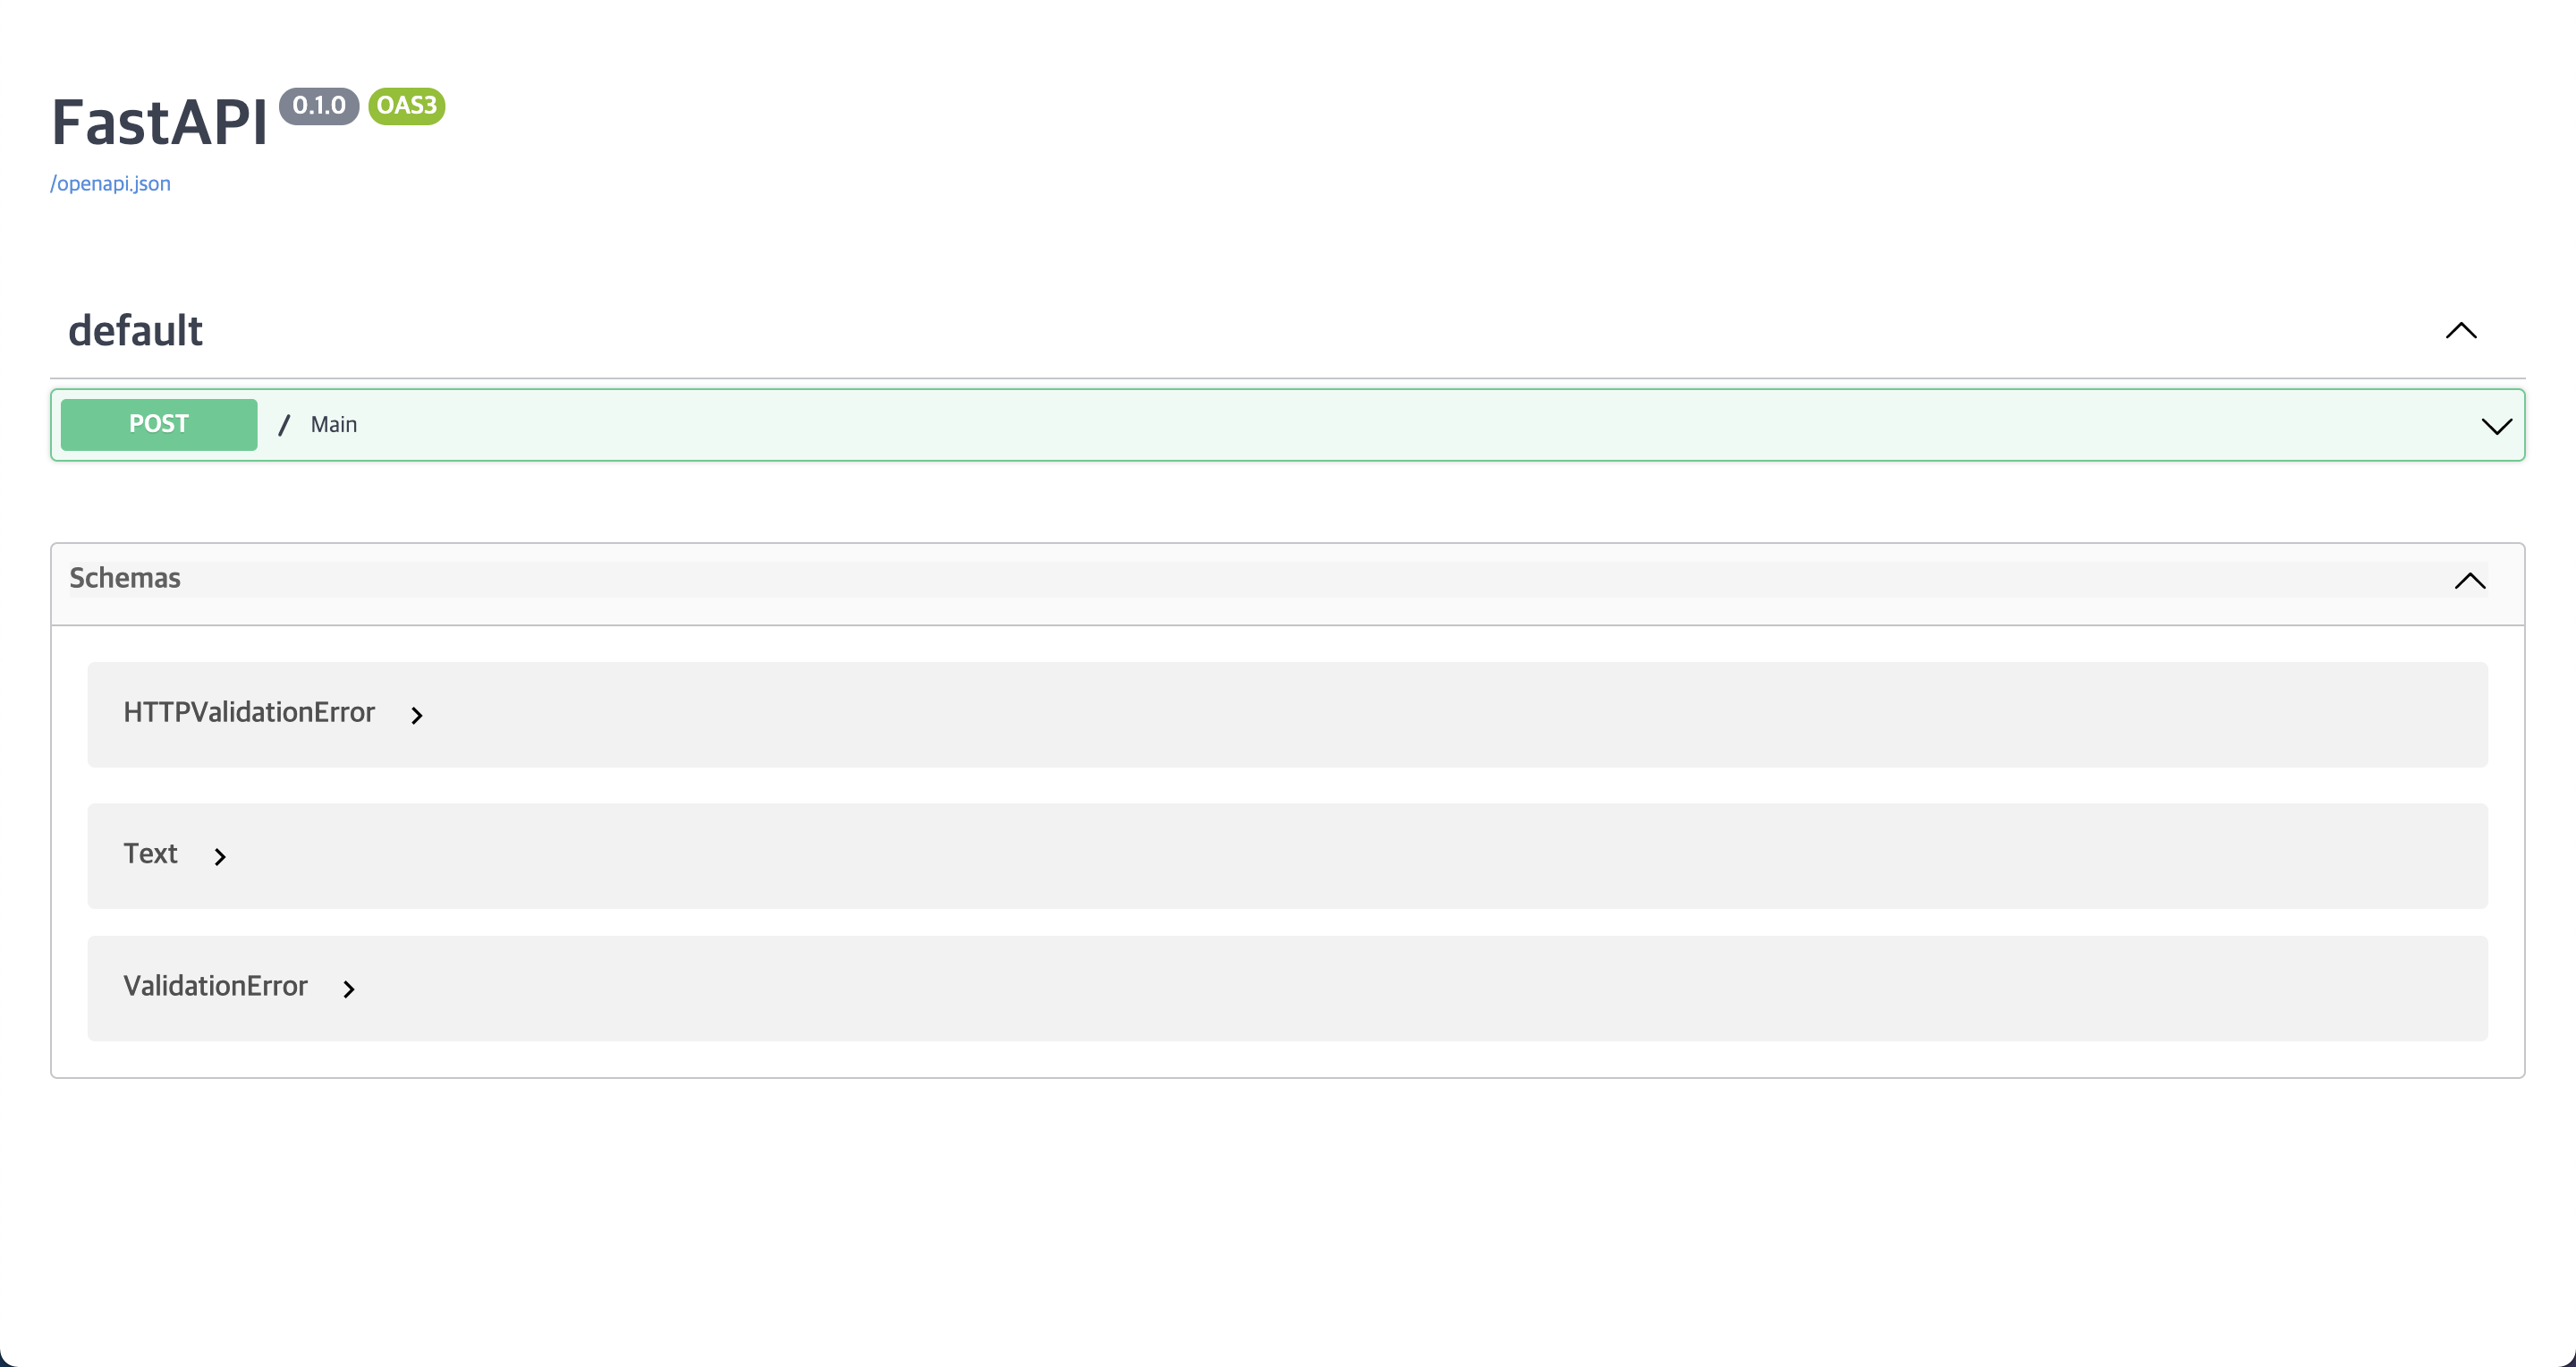
2) Uvicorn + FastAPI 테스트
(1) server.py 작성
from pydantic import BaseModel
from fastapi import FastAPI
from transformers import M2M100ForConditionalGeneration , M2M100Tokenizer
import os , time
app = FastAPI ()
class ModelInference :
def __init__ ( self , model_name : str ):
self . PID = os . getpid ()
print ( f "PID: { self . PID } / Downloading Model..." )
self . model_name = model_name
self . tokenizer = M2M100Tokenizer . from_pretrained ( self . model_name )
self . model = M2M100ForConditionalGeneration . from_pretrained ( self . model_name )
self . model . to ( "cuda" )
print ( f "PID: { self . PID } / Downloaded Model!" )
def predict ( self , src_text : str ):
self . tokenizer . src_lang = "ko"
encoded_text = self . tokenizer ( src_text , return_tensors = "pt" ) . to ( "cuda" )
generated_tokens = self . model . generate (
** encoded_text ,
forced_bos_token_id = self . tokenizer . get_lang_id ( "en" ),
num_beams = 5 ,
)
translated = str (
self . tokenizer . batch_decode ( generated_tokens , skip_special_tokens = True )
) . strip ( "]['" )
return translated
model_class = ModelInference ( "voiceprint/m2m100_418M_ep15" )
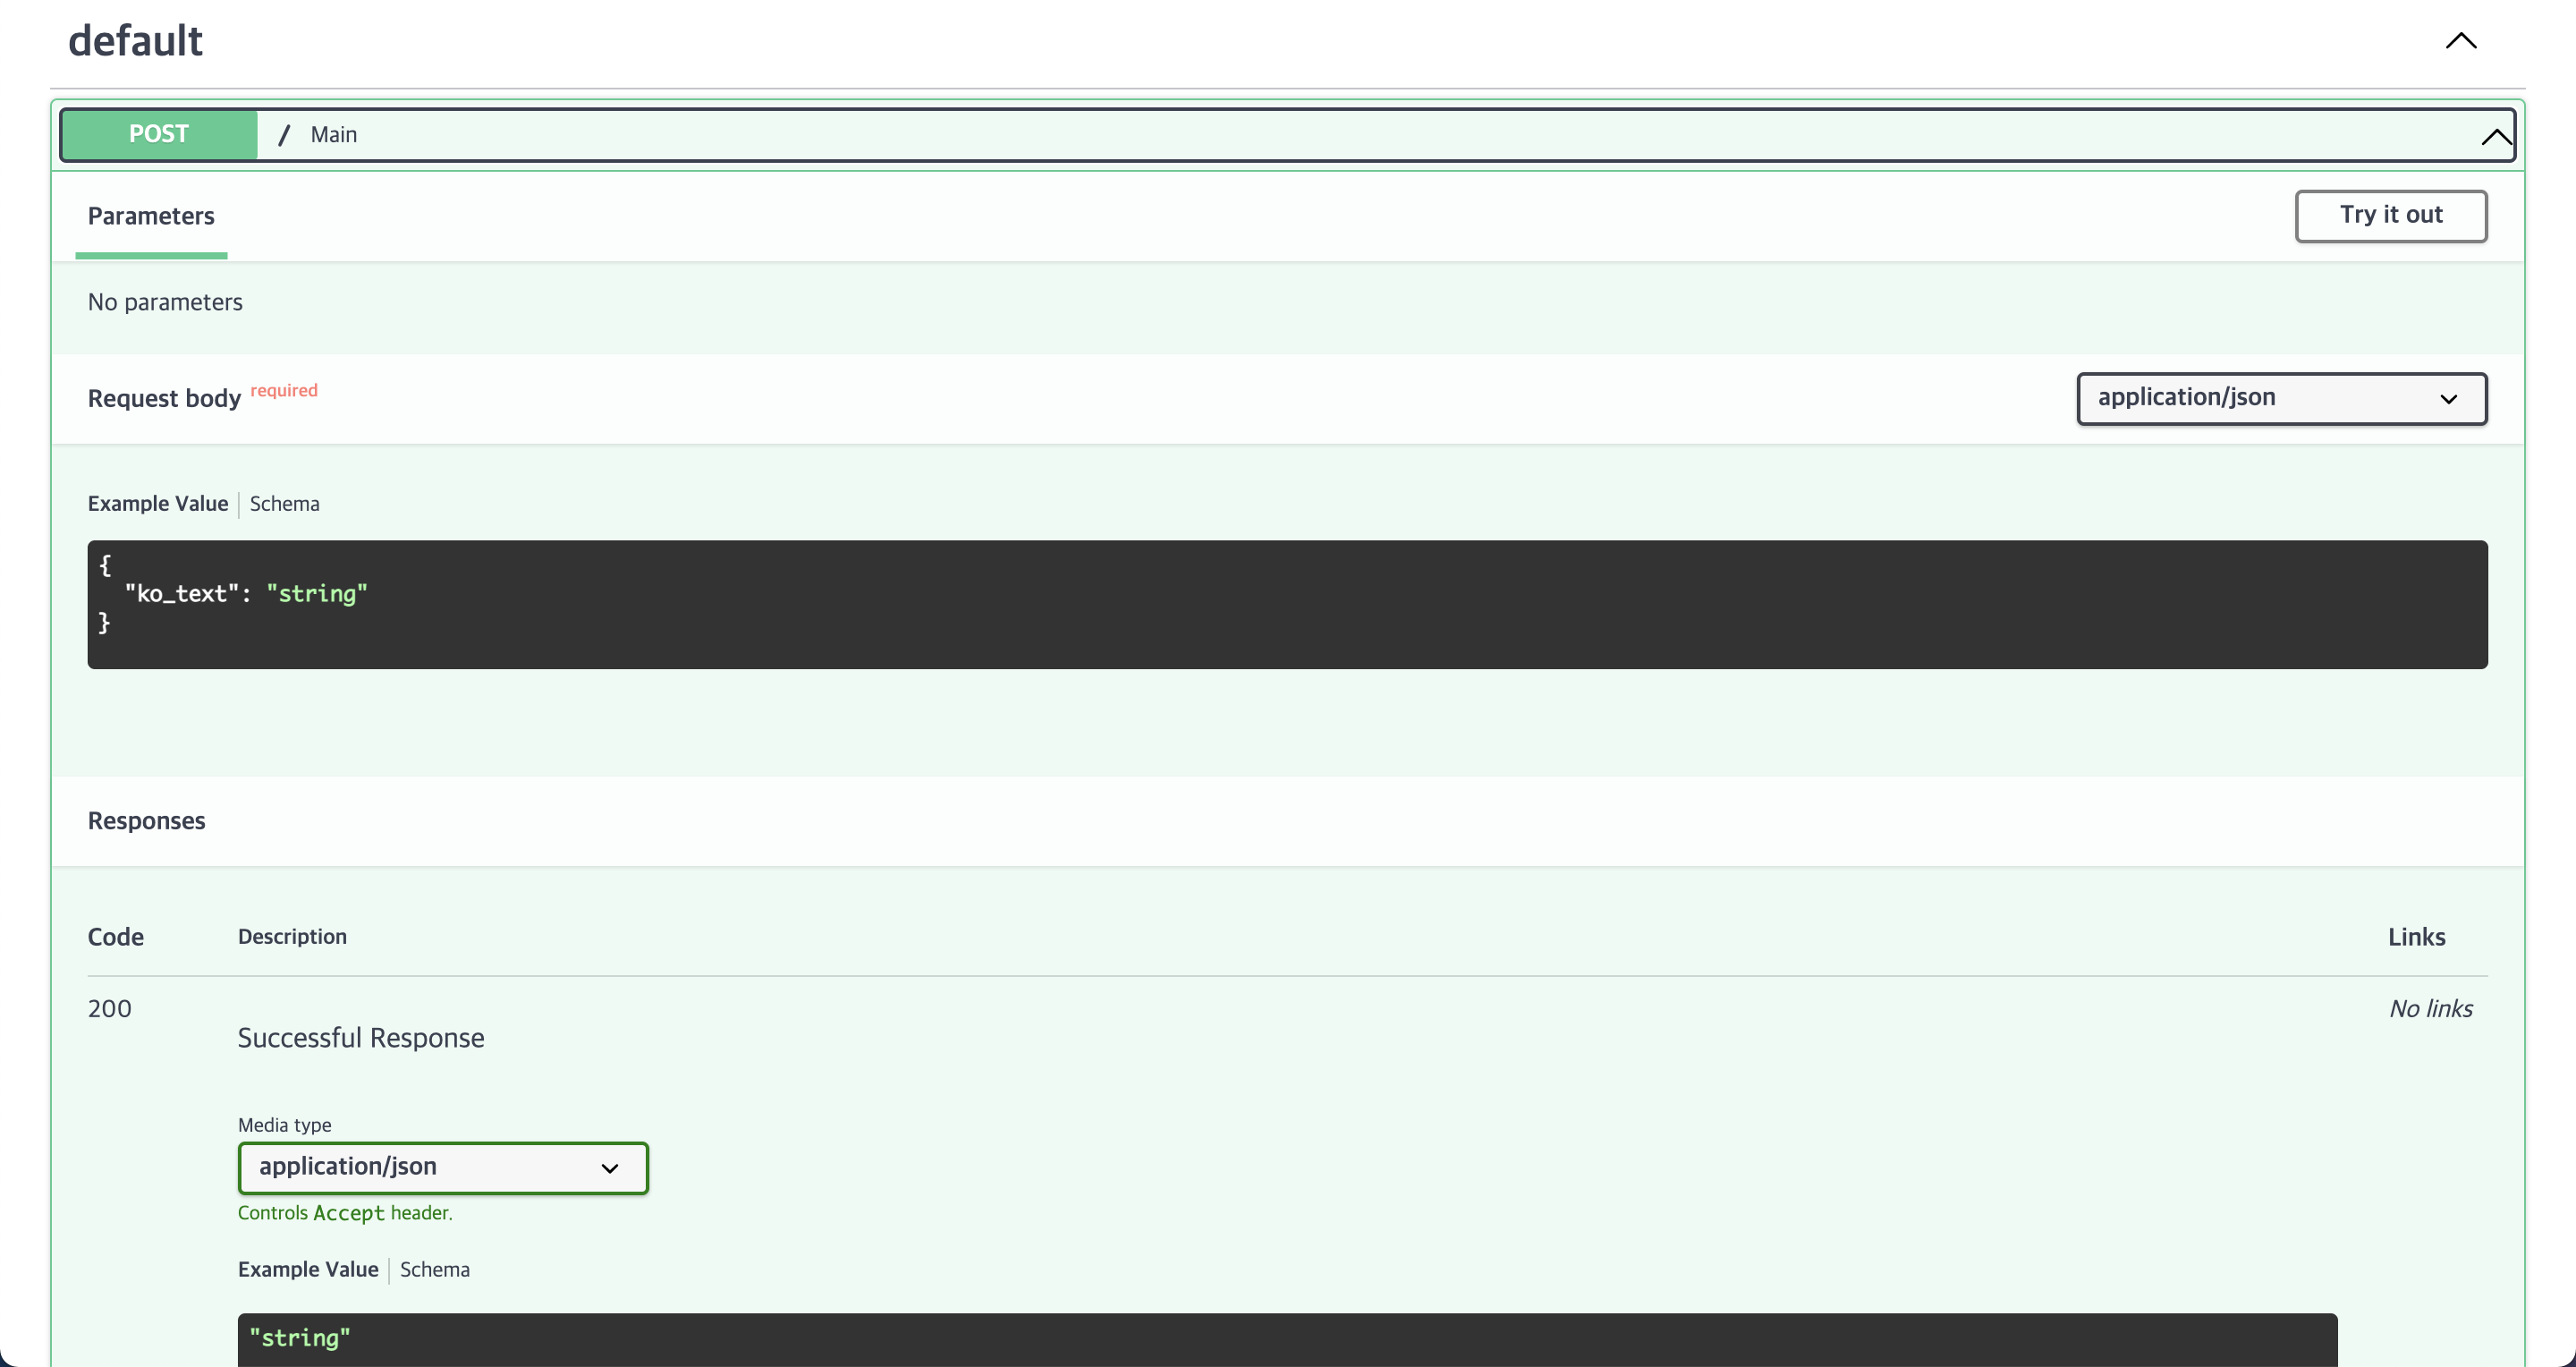
class Text ( BaseModel ):
ko_text : str
@app . post ( "/" )
async def main ( text : Text ):
ko_text = text . ko_text
start = time . time ()
translated = model_class . predict ( src_text )
end = time . time ()
print ( f " \n PID: { PID } \n Korean: { ko_text } \n Translated: { translated } \n Time: { end - start } sec. \n " )
return { "translated" : translated }
(2) uvicorn 실행
$( base) uvicorn server:app --host= 호스트 --port= 포트
(3) client.py 작성
import requests
import json
import os , time
from multiprocessing import Process , Queue
def load_json ( path : str ):
with open ( path , "r" , encoding = "UTF-8" ) as file :
json_data = json . load ( file )
return json_data
def request_text ( idx : int , URL : str , ko_text : str , result_queue : Queue ):
print ( f "Process: { idx } / { ko_text } START" )
data = { "ko_text" : ko_text }
start = time . time ()
response = requests . post ( URL , data = json . dumps ( data ))
result = ( idx , response . json ())
end = time . time ()
print ( f "Process: { idx } / { end - start } / DONE" , flush = True )
result_queue . put ( result )
def main ():
start_time = time . time ()
# CPU_NUM = os.cpu_count()
CPU_NUM = 16
print ( f "CPU NUM: { CPU_NUM } \n " )
PROJECT_DIR = os . path . dirname ( os . path . abspath ( __file__ ))
sample_name = "ko2en_edu_notice_1_training.json"
sample_path = os . path . join ( PROJECT_DIR , sample_name )
URL = "http://127.0.0.1:7001/"
json_data = load_json ( sample_path )
ko_text_list = []
idx , count = 0 , 0
while True :
body = json_data [ 0 ][ "Body" ][ idx ]
ko_text = body [ "Data" ][ "Text" ]
if len ( ko_text ) <= 70 :
ko_text_list . append ( ko_text )
count += 1
idx += 1
if count == CPU_NUM :
break
procs = []
result_queue = Queue ()
for i in range ( CPU_NUM ):
procs . append (
Process ( target = request_text , args = ( i , URL , ko_text_list [ i ], result_queue ))
)
for proc in procs :
proc . start ()
for proc in procs :
proc . join ()
while not result_queue . empty ():
result = result_queue . get ()
print ( f "Process: { result [ 0 ] } / { result [ 1 ][ 'translated' ] } " )
end_time = time . time ()
print ( f " \n { end_time - start_time } sec." )
if __name__ == "__main__" :
main ()
3) Gunicorn + Uvicorn + FastAPI 테스트
Gunicorn은 주로 WSGI 표준을 사용하는 응용 프로그램 서버이다.
이는 Gunicorn이 Flask 및 Django와 같은 애플리케이션을 제공할 수 있음을 의미한다.
FastAPI는 최신 ASGI 표준을 사용하므로 Gunicorn 자체는 FastAPI와 호환되지 않는다.
(1) gunicorn.conf.py 작성
import multiprocessing

# Python Module:Variable
wsgi_app = "server:app"

# Host:Port
bind = "0.0.0.0:80"

# Worker Class == uvicorn(Async)
worker_class = "uvicorn.workers.UvicornWorker"

# Num of Workers
# workers = int(multiprocessing.cpu_count() * 0.1)
workers = 3

# Timeout == 0(Deactivate)
timeout = 0
(2) gunicorn 실행
7. Docker commit 테스트 (옵션)
1) docker commit
commit 커밋할컨테이너이름 지정할이미지이름
commit test test
2) docker commit 테스트
run -it --gpus all -p 호스트포트:컨테이너포트( default:80) --name 컨테이너이름 이미지이름 /bin/bash
8. Dockerfile 테스트
1) Tree 확인
# Base Image
FROM nvidia/cuda:11.0-base
LABEL maintainer = "VoicePrint"
# Set Environment
ENV LANG = C.UTF-8 LC_ALL = C.UTF-8
ENV PATH /root/anaconda3/bin:$PATH
# Change Shell
RUN chsh root -s /bin/bash
# Install Utilities
RUN apt-get update
RUN apt-get install sudo -y && \
apt-get install vim -y && \
apt-get install htop -y && \
apt-get install curl -y && \
apt-get install wget -y && \
apt-get install tmux -y && \
apt-get install systemd -y
# Set Vim Encoding
RUN echo "set encoding=utf-8" >> /etc/vim/vimrc && \
echo "set fileencodings=utf-8,cp949" >> /etc/vim/vimrc
# Add Files
RUN mkdir Project
ADD conda_init.txt /Project
ADD server.py /Project
ADD gunicorn.conf.py /Project
ADD voiceprint /Project/voiceprint
# Download & Install Conda
RUN curl -O https://repo.anaconda.com/archive/Anaconda3-2021.05-Linux-x86_64.sh && \
bash Anaconda3-2021.05-Linux-x86_64.sh -b && \
rm Anaconda3-2021.05-Linux-x86_64.sh
RUN cat /Project/conda_init.txt >> ~/.bashrc && \
rm /Project/conda_init.txt
# Init Environment Variable
RUN /bin/bash -c "source ~/.bashrc"
# Activate & Update Conda
RUN /bin/bash -c "source activate"
RUN conda update conda -y
# Install Python Libraries
RUN conda install pytorch == 1 .7.1 torchvision == 0 .8.2 torchaudio == 0 .7.2 cudatoolkit = 11 .0 -c pytorch -y
RUN conda install -c huggingface transformers -y
RUN pip install fastapi uvicorn gunicorn
RUN pip install tqdm PyYAML pandas sentencepiece
2) docker build
build -t gunicorn/cuda-11.0 .
3) docker run
run -it --gpus all -p 9410 :80 --name gunicorn gunicorn/cuda-11.0 /bin/bash
exec -it gunicorn /bin/bash
4) Gunicorn 실행
9. Nginx
1) Nginx 설치
apt-get install nginx
Nginx 트리를 다음과 같이 확인할 수 있다.
2) Nginx 설정
vim /etc/nginx/nginx.conf
nginx.conf를 확인해 본 결과, http 블록은 /etc/nginx/conf.d/*.conf를 include하므로 다음과 같이 default.conf 파일을 생성한 후 다음과 같이 내용을 완성한 후 설정을 완료하면 된다.직접 nginx.conf에서 http 블록에 다음 내용을 추가해도 무방하다.
vim /etc/nginx/conf.d/default.conf
3) Nginx 실행
netstat -anp | grep tcp
Nginx를 실행하기 전에 해당 포트들을 이미 사용하고 있는지 확인한다.
만약 사용하고자 하는 포트가 이미 사용되고 있다면 중지시킬 수 있다.
또한 다음과 같이 실행 중인 Nginx를 확인할 수 있다.
만약 Nginx에 문제가 생긴 경우 다음과 같이 중지시킬 수 있다.
conf 파일과 포트 문제가 없다면 다음과 같이 Nginx를 재시작한다.
service nginx restart
또한 다음과 같이 Nginx를 중지시킬 수 있다.
다음과 같이 Nginx의 상태를 확인할 수 있다.
systemctl status nginx
4) Nginx 로그
-f /var/log/nginx/access.log
-f /var/log/nginx/error.log
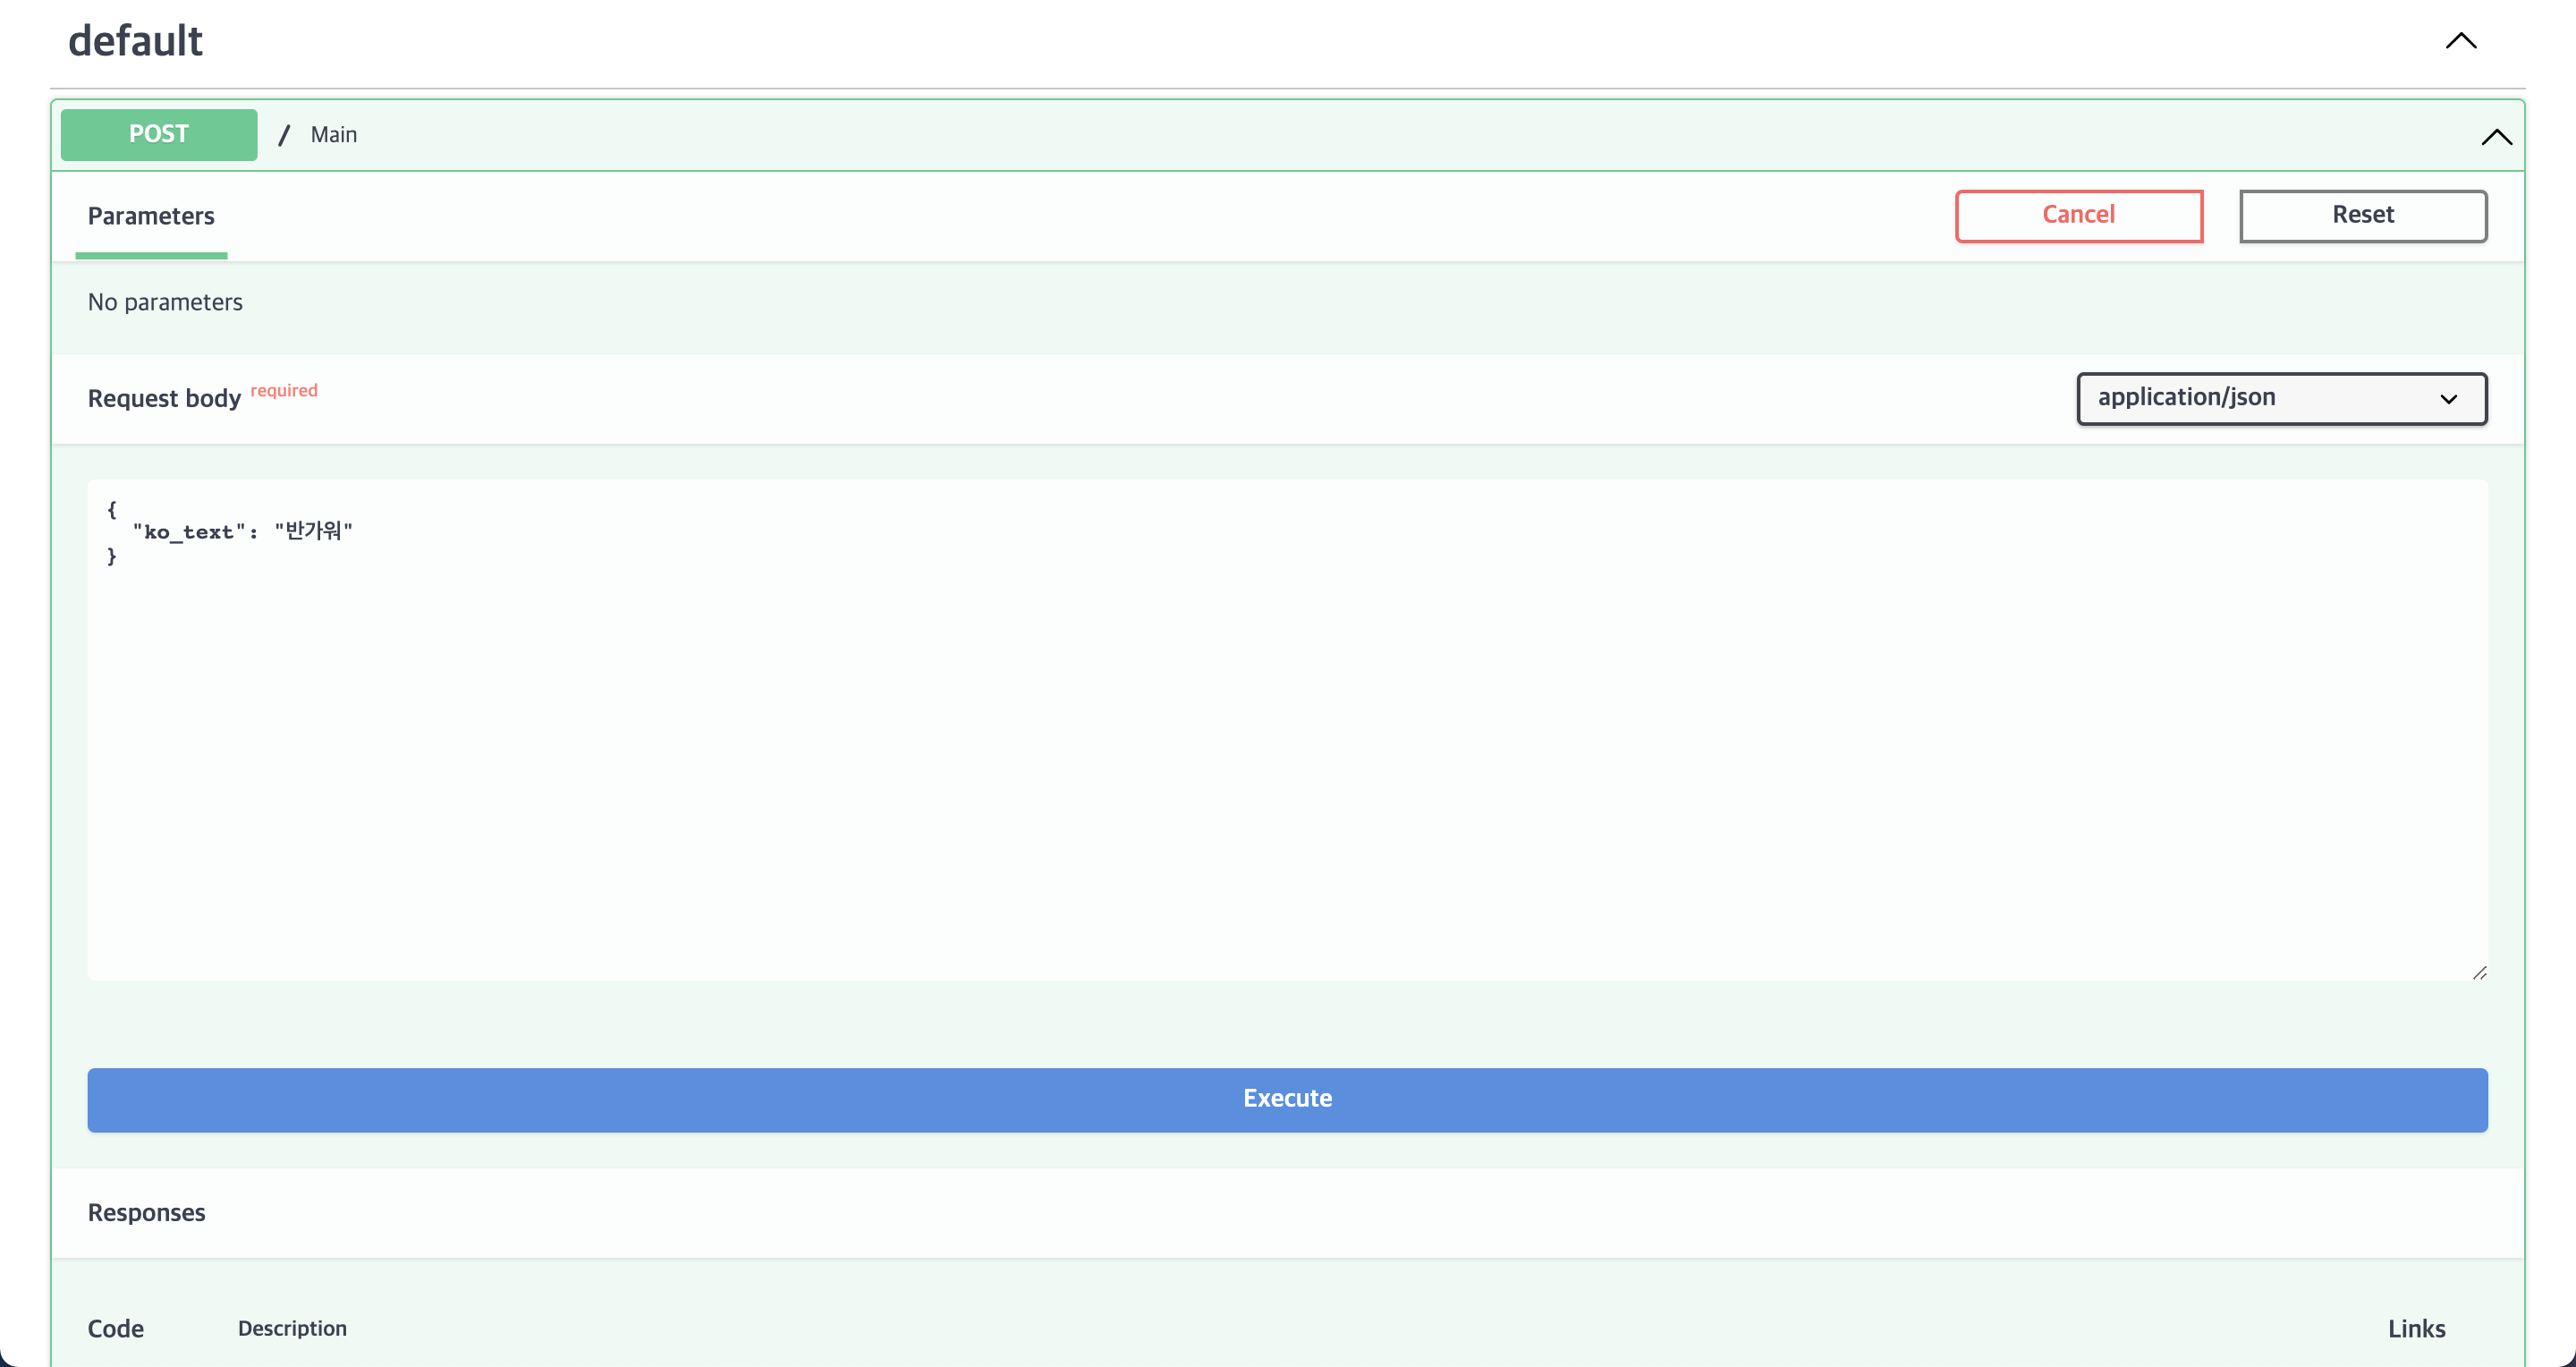
10. Nginx 테스트
body에 "ko_text": "반가워"라고 적고 Execute 버튼을 누른다.